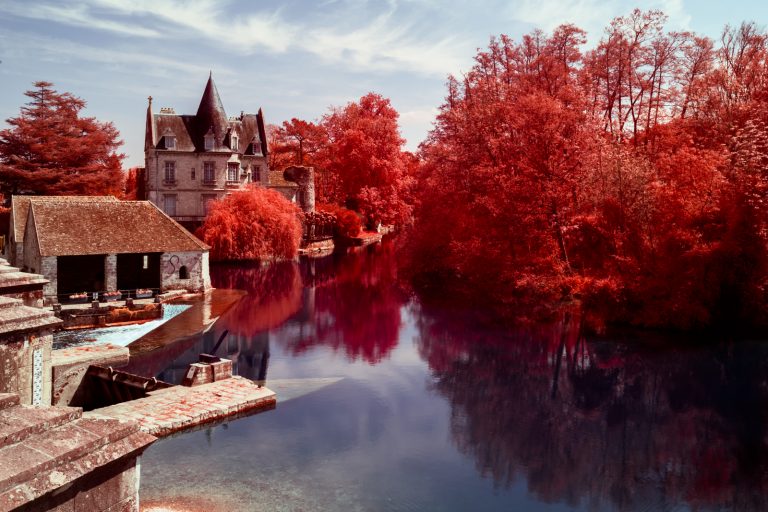
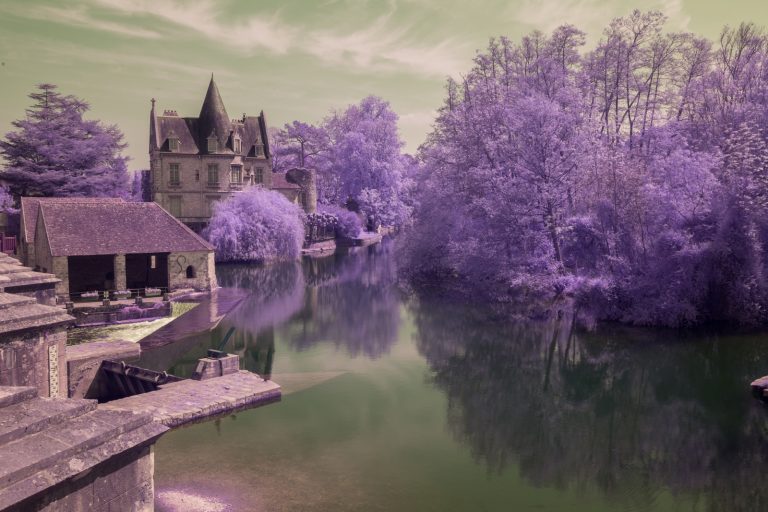
For those who knew the era of color infrared films, dominated by the Kodak Aerochrome, the rendering of images taken in digital infrared is surprising. Indeed, the red/fuchsia colors of the vegetation give way to a luminous white, tending towards bright yellow depending on the filter used.
In this article, I cover the hardware and software steps to get a digital Aerochrome render, before concluding on the most popular alternatives to my method.
In order to find the rendering of the Aerochrome film in digital, it is essential to know its spectral specifications. As a reminder, in film photography, the film acts as a digital sensor, i.e. a photosensitive surface with its own range of spectral sensitivity and method of capturing light and colors.
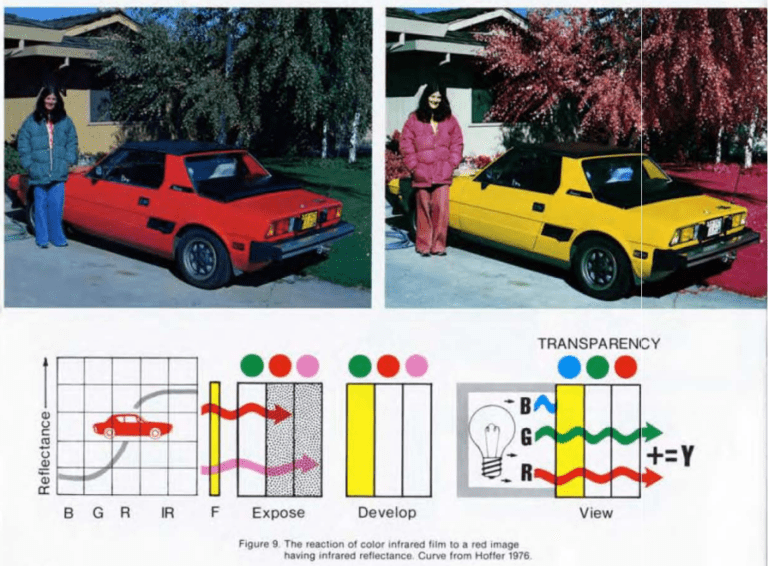
Kodak has published a complete guide dealing with all the specifics of its Aerochrome film. This documentation addresses in particular the spectral sensitivity and the colorimetric distribution in the different layers of the film.
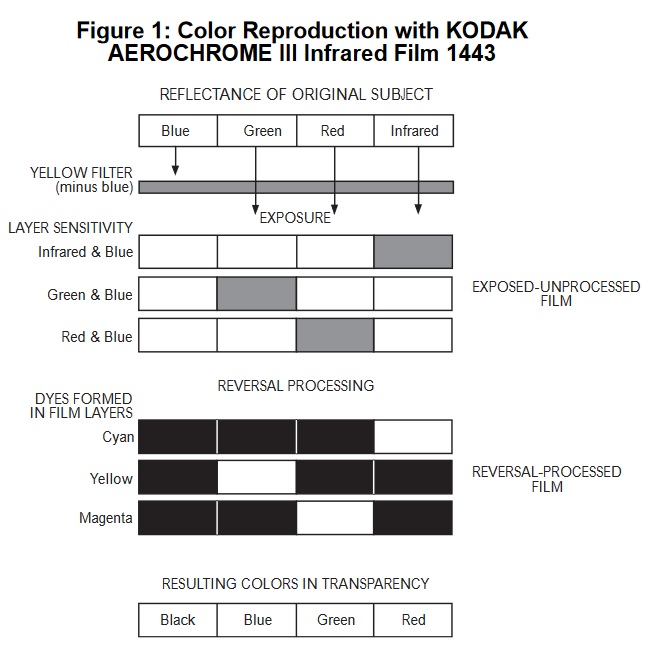
Figure 1 on the left provides information on the distribution of the red, green and blue channels, as well as the infrared one, onto the film during its exposure and then during its development.
The spectral sensitivity of the film extends up to 900nm. Its spectral distribution is as follows:
- A first layer sensitive to blue and infrared signal.
- A second layer sensitive to green and blue.
- A final layer sensitive to red and blue.
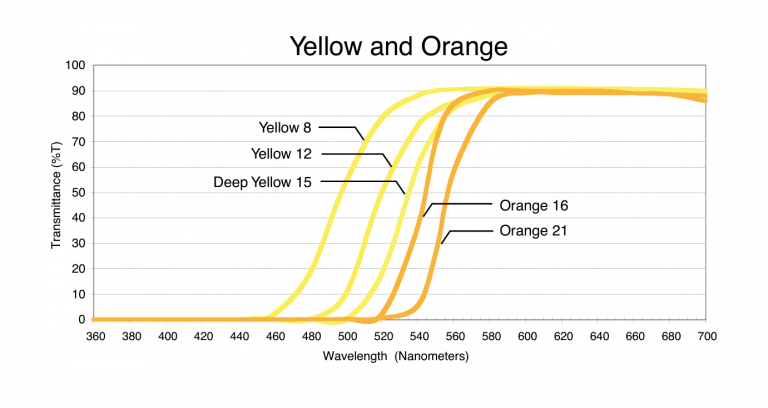
The sensitivity of all these layers to blue colour requires the use of an optical filter absorbing this light radiation. Kodak suggests the use of a yellow filter cutting at 500nm, type Tiffen 12. By combining yellow filter and Aerochrome film, the distribution of colorimetric characteristics after the development of the latter is as follows:
- Red layer: infrared signal.
- Green Layer: Red.
- Blue layer: green.
In the end, the spectral range captured by the Aerochrome film combined with a yellow filter extends from 500nm to 900nm.
Application of Kodak documentation in digital Aerochrome
Before shooting
In order to physically reproduce the rendering of the Aerochrome film in digital infrared photography, it is necessary to maintain both its spectral sensitivity range and its method of distribution of the colorimetric channels. Regarding the spectral sensitivity range, it is necessary to use a full-spectrum defiltered digital camera and to filter the light radiation reaching the sensor by combining different filters:
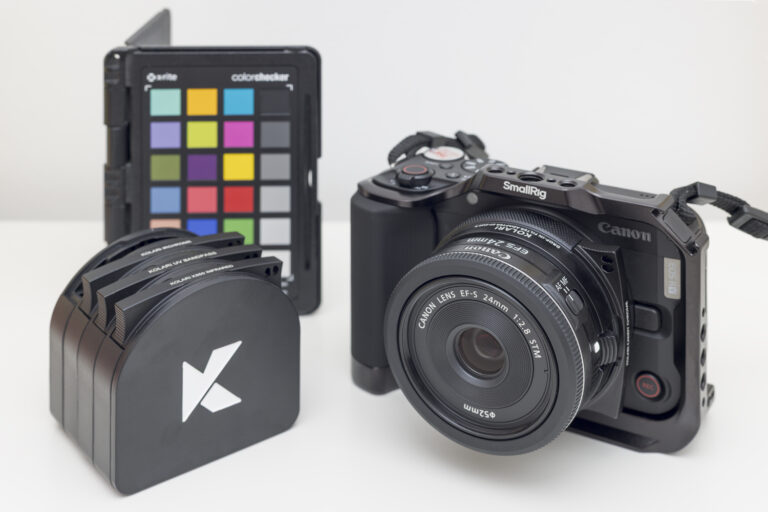
- A high-pass yellow filter cutting below 500nm, Tiffen 12 type.
- A low-pass filter cutting above 900nm, type MaxMax CC2.
The various tests and comparisons that I have been able to carry out during my investigations have shown that the use of the MaxMax CC2 filter is essential mainly with lenses from the film era. Indeed, these benefit from inefficient optical surface coatings compared to current standards. On the contrary, the optical coatings of the most recent lenses strongly absorb light radiation beyond 900nm. So that the use of the MaxMax CC2 becomes useless. For these lenses, only the use of a Tiffen 12 type yellow filter is required.
During shooting
Once the necessary filters are screwed in front of the lens, shooting digital Aerochrome does not differ from a conventional shooting. However, it is essential to apply a personalized white balance on a neutral gray chart before starting.
The photos taken in this way offer vegetation with purple tones and a green sky.
After shooting
The digital files resulting from the shooting phase must follow a process of swap of their colorimetric channels. This channel swap differs, however, from the classic inversion of the red and blue channels.
Out of the camera, RAW files have the following color distribution:
- Red layer: red + infrared signal.
- Green layer: green + infrared signal.
- Blue layer: infrared signal.
To achieve the colorimetric distribution of the Aerochrome film after development, it is therefore necessary to apply the following distribution, using the « channel mixer » tool of Photoshop for example:
- Red layer –> blue layer.
- Green layer –> red layer.
- Blue layer –> green layer.
Here, I advise you to perform another white balance on the file after the channel mixer, based for example on the hue and white balance values obtained on a neutral gray chart that has follown the same process.
Following this step, the new color distribution of the RAW file is as follows:
- Red layer: infrared signal.
- Green layer: red + infrared signal.
- Blue layer: green + infrared signal.
This distribution is identical to that of the Aerochrome film after development, except that the green and blue layers are « polluted » by the infrared signal. In theory, therefore, one would have to subtract the infrared signal present in the red layer from the other two layers:
- Red layer = red layer.
- Green layer = green layer – red layer.
- Blue layer = blue layer – red layer.
In practice, the subtraction between the colorimetric layers is harder than a simple swap. Apart from going through scientific software like LabVIEW, this last step requires several adjustments in the channel mixer and above all a readjustment of the white balance. Especially since these adjustments are specific to each brand of sensors. You will therefore have to persevere until you find the right settings.
At this step, all you have to do is continue your workflow according to the result you want to obtain. Personally I darken the midtones and I lighten the highlights in order to strongly darken the reds while keeping an overall correct exposure
Alternatives to Digital Aerochrome
The digital Aerochrome simulation method described in this article ensures an identical rendering to the use of an Aerochrome film. This method requires good knowledge of the physics of light and post-production tools, and is therefore intended for experienced photographers.
Hardware and software alternatives exist to more easily obtain a rendering of red vegetation in infrared photography.
Alternative channel swap with a 595nm infrared filter
The 595nm infrared filter is known for the bright yellow rendering it offers to vegetation. By performing an swap of the colorimetric channels alternative to the inversion of the red and blue layers, the yellow becomes red and the blue of the sky tends towards cyan / green.
The corresponding mixture is as follows:
- Red = Blue.
- Green = Red.
- Blue = Red
The result is much less subtle than with the digital Aerochrome technique, but makes it easy to diversify the rendering of the vegetation.
Kolari Vision IRChrome filter
The IRChrome Filter represents a major innovation in the practice of digital infrared photography. Developed by Yann Philippe, produced by Kolari Vision, this filter makes it possible to obtain red vegetation as soon as the shot is taken, without the need to swap the colorimetric channles in post-processing. In addition, the IRChrome filter is much less sensitive to hotspots than conventional infrared filters, and can therefore be used with most recent optical ranges.
In the example below, simple adjustments in Lightroom have been made between the RAW file (left) and the final result (right):
Through my expertise in infrared photography, I offer a wide range of IR photo and video recording services for your scientific projects and artistic shootings.
Discover the relating offers by clicking on the following link :
I have built a pack of 7 LUTs dedicated with infrared processing.
These LUTs are optimised to work with Ligthroom Classic and deal with white balance, RGB channel mixer and precise adjustments with this software.
They also work well with other photo and video software.
If you want to use some of the pictures in this article for illustration or commercial purposes, contact me directly by presenting your needs and the desired types of use. I will get back to you as soon as possible with a suitable commercial offer.
Pierre-Louis Ferrer
Discover my other tutorials
Infrared documentation
I have selected for you infrared documentation developping different themes related to infrared photography.
Infrared Video Editing Tutorial with Photoshop CC
In this tutorial, I present you a complete method of infrared video editing using only Photoshop CC.

Digital Aerochrome tutorial: rediscover the magical Kodak film
Discover an unique technique simulating the effect of Kodak Aerochrome film with this digital Aerochrome tutorial.
